Register Sensors into Production Database Using the Sensor GUI
Registration GUI tutorial
(i) Starting the GUI
To start the registration GUI for sensors simply cd into pixels/sensors_production/GUI and run RegisterComponent.py:
1 2 | |
You should see the GUI popping up on your screen and it should look like this:
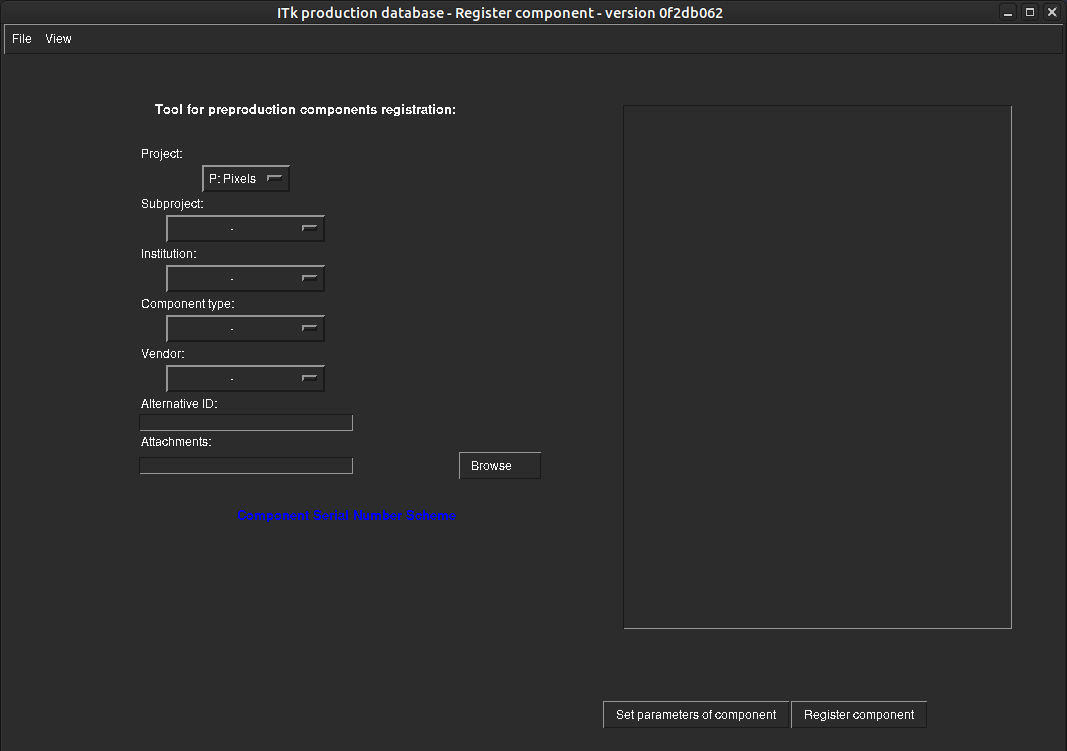
If some of the GUI appears outside your screen, try to click View- > Resize at the top left corner. You can also exit the GUI by clicking File -> Exit.
The GUI version is displayed as the git SHA in the window's title bar. To facilitate the looking up of the module component serial number scheme, the document's link is placed in the windows displayed in blue.
(ii) Parameter selection of components in GUI
Use the drop-down menus in the GUI to select the parameters of the component that you want to register. The list of the paramter information is shown below. Also check out the newest Serial Number Specification here (https://cds.cern.ch/record/2728364?ln=en)
| Component Paramters | Description | SN identifier | Example choice |
|---|---|---|---|
| Project | Project name (default and only choice is Pixels) | None | P:Pixels |
| Subproject | Subproject name (The pixel system uses PI, PB, PE and PG) | XX | PG: Pixel General |
| Institution[^1] | Name of the vendor institution of the component | None | Hamamatsu Photonics K.K (HPK) |
| Component type | Component main type: Wafer or Sensor tile | None | Wafer |
| Type | Type of component also indicating the size and thickness. See SN Specification. | YY | L0 inner pixel 3D sensor tile (50 x 50 μm) |
| Vendor | Vendor producing the wafer/sensor tile (V1-V9) | 1st classification digit (NNNNNNN) | V4 |
| Sensor type or test structure[^2] | Type of sensor or to specify the test structure type | 2nd classification digit (NNNNNNN) | Quad |
| Dicing Vendor (optional)[^3] | Dicing vendor serial number for wafer. | None | Advacam |
| UBM Vendor (optional)[^3] | Vendor for underbump metal (UBM) deposition. | None | Advacam |
| Version | Version/stage of component (pre-production: 1, or production: 2) | None | Production |
| Alternative ID | Mandatory unique local manufacturer SN of wafer or sensor tile in the standard form VX-Y-WWWWWW-D-NNN: (X-Vendor Number, Y - Version of component, WWWWWW - Wafer number, D - sensor or test structure type (2nd classification digit) NNN - Sensor number and position on wafer) |
None | V4-2-000001 (wafer)[^3] V4-2-000001-3-001 (production version of sensor tile on wafer with position 1)[^2] |
| Local manufacturer wafer name (optional)[^3] | Optional name for the wafer, usually similar to alternative ID but without the mandatory format. | None | 42694-06 CPAL1 150 3529-01 ID0006 |
| Scratch ID | Unique scratch ID per wafer made with probe needles by the vendor on each tile. | None | 0006 |
| Sensor Batch | Unique shipment batch name in the format Pixel_Sensor_<vendor>_<reception date> with vendor in the form VX and the reception date in the format YYYYMMDD. If nothing is entered the date defaults to the date of the registration. |
None | Pixel_Sensor_V6_20240401 |
[^1] All sensors should be registered under their vendor institution, e.g. HPK, Micron, FBK, SINTEF etc.
[^2] Only for sensor tile registration
[^3] Only for wafer registration
Tips: You can also use the Browse button to select a data_dictonary-file filled out with the same structure as viewed in the white window after clicking "Set parameters of component"
(iii) Registering components
After setting all the necessary parameters for the component you want to register, click the "Set parameters of component" button.
The field to the right should be filled with the JSON-dictionary like this: 
Check this output to see if it's correct (See additional information and read section V if unsure.)
You can then proceed to click on "Register component" button.
Pay attention to the terminal where the GUI was executed as there will be additional user input required (e.g. if children should be automatically registered) and information and status displayed.
The component together with all the information should now be uploaded to the PDB and can be seen in the webApp under "My Components".
If not, please read the message in the terminal to see what went wrong.
NB: If your new to the GUI, please read the additional information!
(iv) Checking your selection
Check your selections:
- Every parameter should be filled out (except if they are optional).
- The type must correspond with the subproject selected (like all test structures should be PG:Pixel General)
- Vendor selection must be equal to first two digits in the Manufacturer SN
- Alternative ID must be unique (no other component can have the same SN) and in the right format
If you register a sensor tile, make sure that the alternative ID matches the wafer manufacturer SN and that your wafer contains the correct children slots for your sensor to be connected to it.
You can always modify/debug the script by going into the /GUI folder.
For bugs/feedback found in the GUI scripts, please make a git issue.